New in the Shop!

Showing posts with label Home. Show all posts

Wednesday, November 9, 2011

Ahhh Autumn.

I think I have the opposite of seasonal affected disorder. Instead of getting depressed when it's dark all the time, I start to kick into high gear as soon as the leaves start to fall. By late December I'm on a high that lasts me until May. Then it gets hot out, and I spend the entire summer indoors wishing I had AC. It takes all sorts right? Anyway, I'm feeling great! Look at my back yard!

I've still got flowers!

There's Kale in the veggie planters,

The moss is taking over,

And barbecue season is most definitely done.
I'm in seasonal heaven!

Wednesday, October 19, 2011

Free Printable - Vintage Recipe Card!

I've been a horrible blogger lately. I don't want to only blog about my shop, but it's pretty much the only crafty thing I'm doing that isn't Christmas knitting. Seeing as I can't go showing everyone their Christmas presents in October, I just have to bite my tongue.

However, with the approach of fall comes the irrepressible desire to cook ALL THE THINGS. I don't know if it's the bountiful harvest that gets me, or the innate urge to gorge myself in preparation for hibernation, but whatever it is, I can't stop thinking about recipes. In honour of my hibernation urge I'm going to be sharing a few favourite recipes in the coming months.

You know what recipes need? Cute cards to write them on. We found this adorable recipe card with my grandmother's cookbooks last winter. I LOVE this recipe card. So, I'm sharing it with you. Use it to store your favourite fall recipes, or print it off and give it, with the recipe written down, with a batch of cookies as a frugal but thoughtful holiday gift.

Just click on the photo to be taken to a full-sized downloadable image. Enjoy!

The original, complete with delightful aged paper.

Cleaned up, for your black-and-white printing needs.

While we're at it, check out some of my older recipe posts!


Peanut Butter Cupcakes


Chocolate Butterflies


 Shortbread Cookies


Curry-Coconut Squash Soup

Wednesday, June 22, 2011

Links: One of these days I'm gonna get organezized

credit


Hi fives if you know what movie the title comes from.

I'm not quite sure why, but this time of year is my lazy season. I don't want to cook, I don't want to clean, I don't want to do laundry. The house gets messy, and the family lives on noodles. I thought a few links to projects that might help a crafter get organized might help break me out of my summer messiness rut.


Links after the jump!


Wednesday, June 15, 2011

Links: Upcycled

credit


I love people's upcycling tutorials. I do find that it would often cost a fortune to make a replica of their tutorial because it isn't often you find the exact same recyclable treasures as someone else. They're great inspiration though. Here are a few links to tutorials I like - they are even made from things you might be able to find!


Get the links after the jump!

Monday, May 30, 2011

Gardening Win!

Our patio area has an unfenced drop down to our lower garden - it's the perfect opportunity for an insane toddler to cause herself some damage, get filthy muddy, and destroy all my hard gardening work in a single leap. I knew I needed to fence it off, but I couldn't figure out a safe, inexpensive fence that could be assembled cheaply and with my limited tools and building knowledge. Then I had an epiphany! Planter boxes! They were an easy project with dramatic results - I now have a veggie garden, fence, and continual source of smug satisfaction, all in one! You could do this yourself. I made 2 5'x1'x1' planter boxes using untreated cedar fence boards (pressure treated wood is a little poisonous for my veggie gardening tastes) and cheapo gardening soil, all for about $48. I used a handsaw, a hammer, and nails. And - get this - my plants are actually growing! I'm well aware that the planters are a little over full - I'll deal with it when it becomes an issue.

They look pretty sharp don't they?

Baby bean

Zucchini!

This tomato variety is called Super Fantastic. I could hardly pass it up with a name like that!
I also had another brilliant stroke of insight - I was watering my mint next to my empty strawberry pot (I planted flowers in it last year, it was very pretty) and thinking 'gee it's a damn shame that I don't plan on planting anything in this cool pot this year' and then I went over to water my strawberries and I was thinking ' gee it's a damn shame that these berries are so potbound in these tiny little... AHA!' And so, Emma the Genius transplanted the strawberries into the strawberry pot. Sometimes I amaze even myself.


Thursday, April 7, 2011

How To: Turn a Desk Calendar into a Wall Calendar - Framing a Book!

I've been using a day planner for years now, but lately I've learned that I am not the only one in this family that needs a little help staying on top of daily planning. However, keeping a wall calendar is no good, because the little squares are way too tiny to write much of anything in. I'm not into the look of those giant wall calendars with the dry erase pens. I like organization, but not that much. Thus I decided to convert my beloved desk calendar into a wall calendar the whole family can use.


 Ours is mounted on the wall, but it's in the dark, ugly grotto next to the door, so I photographed it resting on a shelf.  Where, I might add, It looks awesome.


Get the tutorial for a wall mounted desk calendar, and for the mods to safely prop it on a shelf in the long term, after the jump!

Monday, April 4, 2011

Perler Pixels

I've still got a cool tutorial for you, I promise, but this last weekend was nuts, and I'm tired, so I'll show you a cute project instead. OK? I'll be back up to speed soon.

I took my own advice - A week or two ago I linked to a tutorial for some adorable Super Mario coasters. Shortly afterwards, Jake decided it would be OK if I made him coasters for his birthday. He's been begging for geeky home decor for so long.

Here's my version!


They look great, and they're holding up to all the abuse Rei can dish out. She killed our last set of coasters, so durability is imperative.

Saturday, March 12, 2011

How To: Make an Oilcloth Picnic Mat for your Toddler


I don't know about other one-and-a-bit-year-olds, but Rei has an almost ridiculous independent streak. It's only gotten more pronounced as she's learned to walk. Sometimes getting her to eat can be an enormous battle of wills. I've found that allowing her to eat her snacks a little more on her own terms gets a lot more healthy food into her belly. She's much more likely to eat sitting on the floor with her toys than strapped into her booster chair. With the cleanliness of my carpet, and thus my own sanity, in mind, I whipped up this cute little oilcloth picnic mat for her to sit on. It's great indoors and it will keep her snacks free of dirt in the summer months when we are out in the yard!


Want to make one? It's easy - a perfect beginner project! What I did, after the break....

Monday, January 10, 2011

Meta Book Shelves

When I saw this photo tutorial, linked through One Pretty Thing, I fell in love. It took me a year or so to find the space, but when we got a Kinect for Christmas and had to re-arrange the living room to increase our gaming space, the wall formerly occupied by the TV opened up a world (well, a small wall) of decorating opportunity. Check these out!


Friday, December 17, 2010

Star Wreath Tutorial

Do you (or someone you know) get a real Christmas tree each year? Mmmmm that smell...
Do you buy one that is much too tall for your ceiling?
Do you have to cut part of the top off to make it fit, and then manicure what's left of the top so it doesn't end in an unspectacular tree-plateau?

This happens EVERY YEAR at my parents' house. I took the manicure trimmings home to see if they could be put to some use, and I came up with a simple, practically free wreath that I just love. Look at it! Don't you want one?


Isn't it sad that I don't even have an available door to hang this on?

Tuesday, December 7, 2010

Happiness and Cheer

I love the Christmas season - I start looking forward to it around July. That might have something to do with starting my Christmas gift-making in the summer, but all the same, I'm glad December is here. J and I decided we would give ourselves a new fake tree this year (we haven't given each other Christmas gifts since we first met, so it was exciting to do something this year). It's up. It's festive. I love it!


Wednesday, July 28, 2010

Hung Out to Dry: A Brief Tutorial

More cloth diapering stuff folks... I'll stop soon, I promise.

One of the drawbacks of wool soakers (for more on wool soakers as diaper covers, see my previous post) is that you need to get them good and dry between uses. We have five, which we rotate through each diaper change. Having 5 diaper covers on the go, some of which may be damp and need to dry before their next turn, can be a space issue. You can't stuff them in a drawer because they won't get dry (or at least they won't in my humid basement nursery) but leaving them lying all over the place looks untidy and leaves them vulnerable to cat-related abuse. The only option for me was to hang them up.


This little rack was about a half hour project, if you don't count the time the paint took to dry. I used:

  • 3/4" x 2" strip of wood, cut to about 31" (the length is up to you - I had this bit of wood lying around and as I don't have a saw, it stayed the length it was).
  • 7 Wooden clothes pegs (or whatever number suites your needs - odd numbers are more aesthetically pleasing than even numbers).
  • Hot glue, wood glue, or craft glue.
  • Paint (I used acrylic).
  • Ribbon for embellishment, if that's your thing.
  • Drill and screws.
Measure out where you want your clothes pegs to be and mark your strip of wood. Glue the pegs to the wood, making the top of the peg flush with the top of the wood. I used hot glue because I am into instant gratification.
Once the glue is dry, paint! I recommend a coat of white as a primer if you are doing a light or bright colour, especially if your bit of wood, like mine, has manufacturey details stamped on it. When the paint is good and dry, embellish your rack (lol... Rack... Sorry, I lack maturity and self control) in whatever way would suit your room decor. I wrapped ribbon around mine and glued the ends down on the back, which gives a nice bit of colour and texture and also coordinates with R's floral mobile and the wall decor.
Drill two starter holes so you don't bugger up all your hard work trying to force bits of metal through the wood, and fix the rack to the wall with screws. This rack is only meant to hold lightweight objects, and weighs almost nothing itself, so don't worry too much about drywall screws and the like.


Yay! I would guess this project cost about three dollars, factoring in all the materials, but if you are like me and have this sort of stuff lying around, it's free! I love it for hanging soakers, but it would be a really cute way of storing hats and coats or dresses or any other adorable baby clothes that need a home and want to be displayed.

By the way, how much do you love those numbered cards on the wall above the soakers! The illustrations are ridiculously sweet and the cards are sturdy enough that they can be used as a teaching tool when your little one is learning to count!


They are the Animal Counting Cards by eeBoo, an amazing brand of beautiful kids' toys and learning aids. Ours were a gift bought at Sprouts, a lovely boutique in downtown Victoria. I can't afford their stuff, but maybe you can! Their selection of high quality children's items is delightful. I want every single thing they sell.

Thursday, July 15, 2010

Flower Mobile Tutorial

I promised to write this up months and months ago but I never did. Bad me.

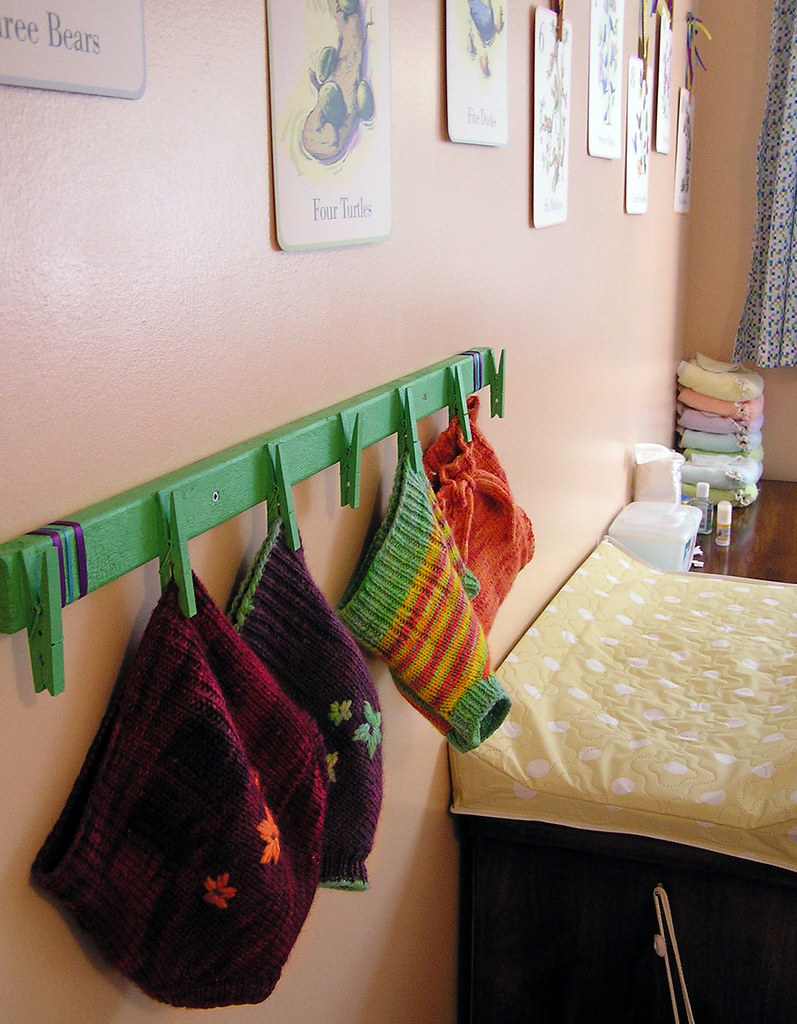
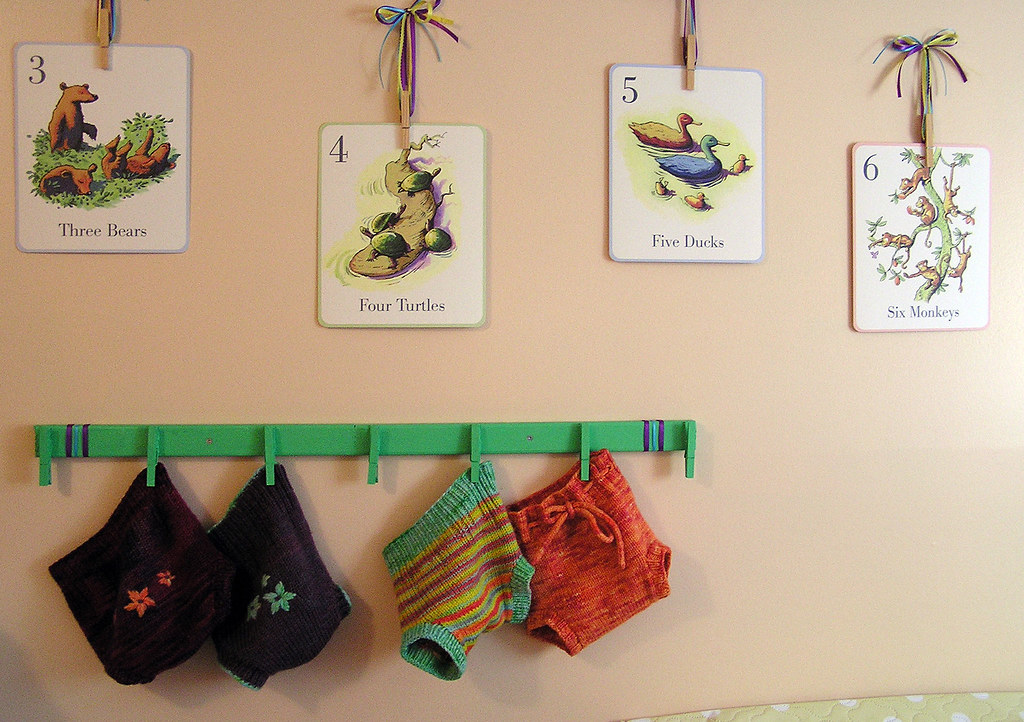
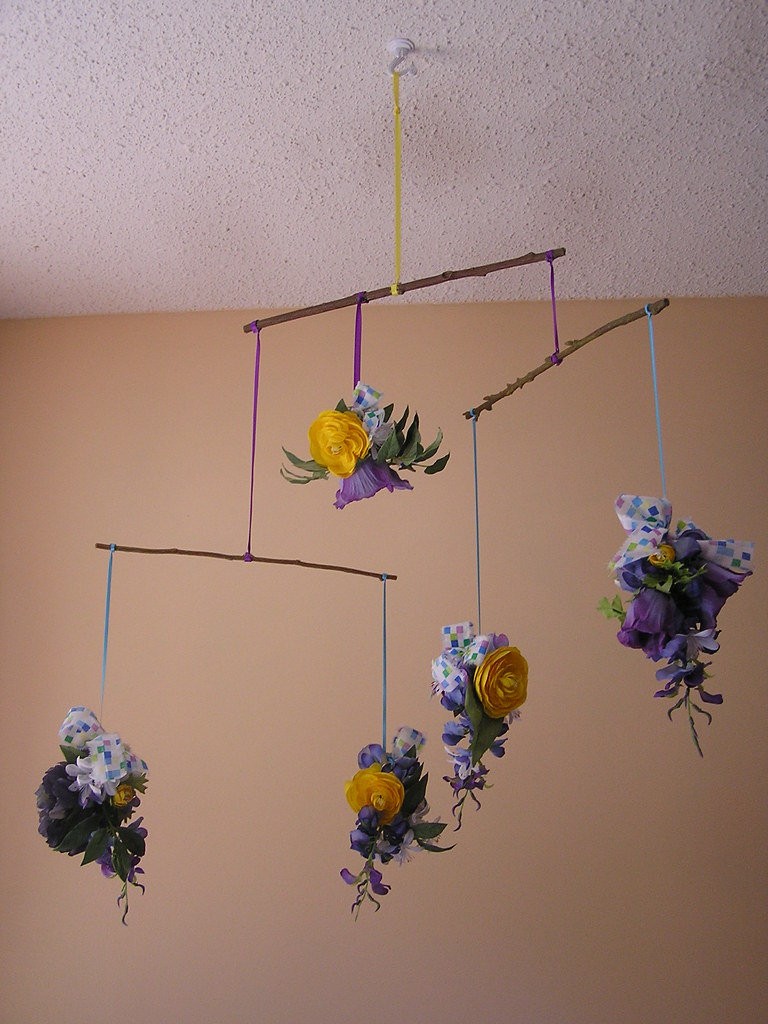
When we were decorating R's room I really wanted to avoid the pretty pink princess look. I'm just not feminine like that, and cute little girly things tend to get my hackles up. Instead, I chose to focus on a palette of greens, blues, purples and yellow. I love hanging mobiles and they look so sweet over a crib, but most of the ones I have seen in stores are tiny and cheap and tacky and attach to the side of the crib, or are stunning but prohibitively expensive. I wanted something with a little more oomph but on the cheap. And so, the hanging bouquet mobile was born.


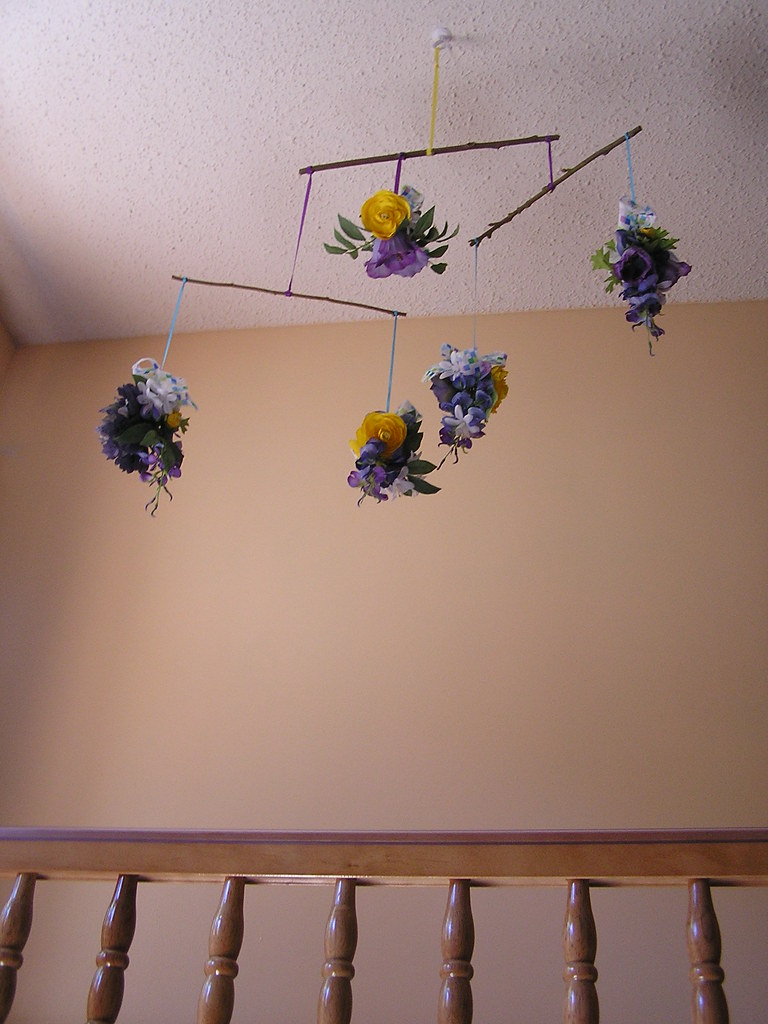
Isn't that just the worst paint colour by the way? It looks like that 'flesh tone' coloured pencil crayon that doesn't remotely resemble the skin of anyone you have ever met.

To make the mobile you need:
  • a large bouquet of fake flowers, some of which need to have long, fake wood stems.
  • ribbon in colours that coordinate with your flowers
  • hot glue
  • sturdy wire cutters (or wimpy little ones augmented by determination, elbow grease, and muttered profanities)
First you need to get all the flowers and leaves off the stems. Some will just pop off, some need to be snipped. Make sure you leave little stems on them so you have something to glue together. Separate your flowers and leaves into two piles and select some good stems to use as the 'branches' of your mobile. You need one sturdy one for the top and two lighter ones, shorter than the first and of different lengths, for the bottom tier.


Begin assembling flowers and leaves however you like them, using lots and lots of hot glue (seriously, go nuts) to secure them together. If you are gluing flowers with very thin plastic stems, be aware that the glue may be hot enough to melt the plastic. Sometimes I found it worked best to apply the glue, let it cool quite a bit, and then smush the little stems into the glue blobs.

I used clusters of wisteria as a base and built corsage shaped flower clusters. Little flower spheres would be super cute and have a more modern look. Don't forget leaves! I topped my clusters off with a bow using torn strips of fabric left over from the curtains and bed skirt I made. This really pulled the whole room together. However, using the same ribbons as you string the mobile with would be very pretty as well.


Make five clusters: two for each of the bottom branches and one for the middle of the top branch. After the glue has cooled all the way, do your best to remove all those nasty little hot glue cobwebs clinging to your flowers.

Stringing the mobile is the hardest part. I tried it with fishing wire, but I found that this particular mobile looks goofy if you can't see what's holding it together. So I left it on the table for a while to rethink my options and the cat came in and chewed up all the fishing wire. It wasn't meant to be.

Start with your bottom tier branches. Choose two bunches of flowers and tie a length of ribbon to them and then to the ends of the branch. Don't make the lengths of ribbon too even unless your flower clusters are very symmetrical and you are aiming for a geometric effect. Mine had an inch or two of difference, giving the mobile a more natural look. And yeah I know it isn't exactly natural for bunches of flowers to hang from flying branches. You know what I mean. Hide the knot on the branch by wrapping the loose end of the ribbon over it and securing it with a dot of glue.

Once your bottom branches have their flowers attached, find the midpoint of the branch by balancing it on your finger. You don't want it to tip even a little bit in either direction - it should sit perfectly horizontally on the tip of your finger. Tie one end of a strip of ribbon around this point and hold it up to test the balance. Make any adjustments necessary and then put a tiny dot of glue on either side of the knot so the branch can't slide. Do this for both bottom branches.

Secure the bottom branch ribbons to the ends of the top branch the same way you tied the flowers to the bottom branch. You will want the ribbons to be quite different in length (a few inches). Hang one side, hold it up and see if you like it, then do the other. Make sure your bottom branches can spin without getting hung up in each other's ribbons. If the bottom branches are too long you may run into this problem.

Using a fairly short bit of ribbon, tie the fifth flower cluster to the top branch. It needn't be in the dead centre - play around with the placement and do what looks best. Make sure it doesn't interfere with the other branches and ribbons.

Find the balance point of the top branch and tie a ribbon there, just like you did with the lower branches. A loop in the other end of the ribbon can be used to hang your mobile. Make sure that it is secure if you are hanging it over a crib - use the proper hardware for your ceiling. You would feel like a terrible parent and a failed crafter if it fell on your kid. Don't hang it low enough that an older baby could grab it, and be mindful of the fact that you do need to be able to lean over the crib without getting bopped in the face by an errant bunch of flowers.


R loves this mobile. It's very large and striking, and it absolutely mesmerizes her when I give it a spin. Have fun!