
One of the drawbacks of wool soakers (for more on wool soakers as diaper covers, see my previous post) is that you need to get them good and dry between uses. We have five, which we rotate through each diaper change. Having 5 diaper covers on the go, some of which may be damp and need to dry before their next turn, can be a space issue. You can't stuff them in a drawer because they won't get dry (or at least they won't in my humid basement nursery) but leaving them lying all over the place looks untidy and leaves them vulnerable to cat-related abuse. The only option for me was to hang them up.
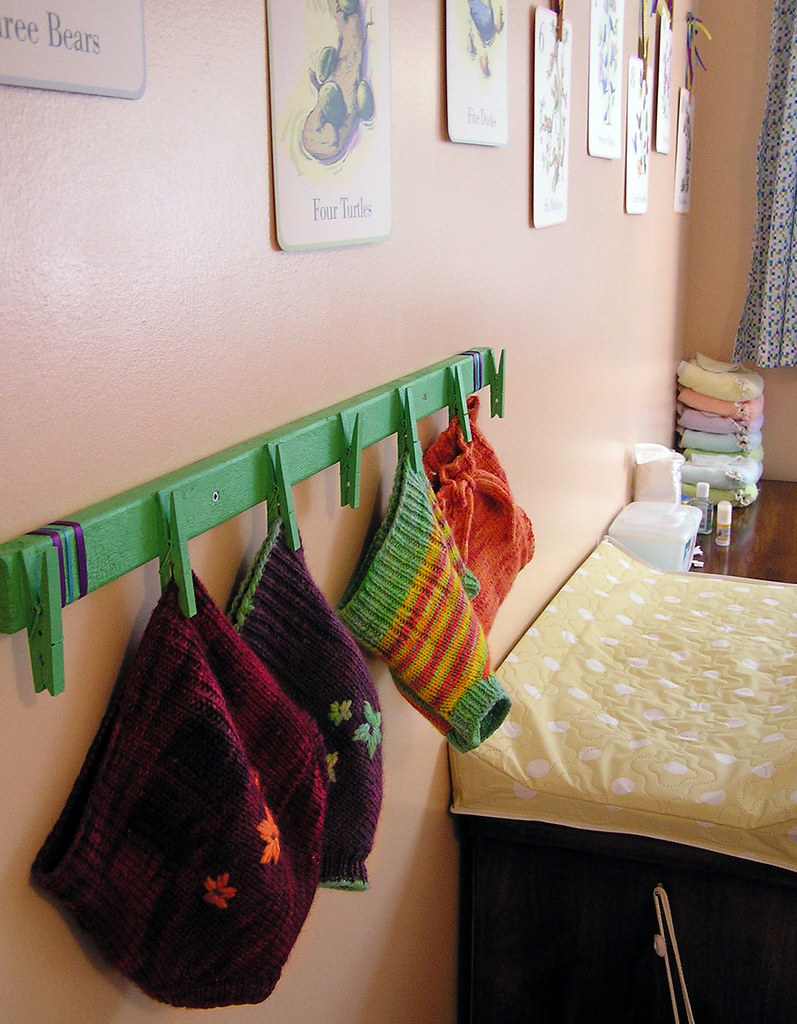
This little rack was about a half hour project, if you don't count the time the paint took to dry. I used:
- 3/4" x 2" strip of wood, cut to about 31" (the length is up to you - I had this bit of wood lying around and as I don't have a saw, it stayed the length it was).
- 7 Wooden clothes pegs (or whatever number suites your needs - odd numbers are more aesthetically pleasing than even numbers).
- Hot glue, wood glue, or craft glue.
- Paint (I used acrylic).
- Ribbon for embellishment, if that's your thing.
- Drill and screws.
Once the glue is dry, paint! I recommend a coat of white as a primer if you are doing a light or bright colour, especially if your bit of wood, like mine, has manufacturey details stamped on it. When the paint is good and dry, embellish your rack (lol... Rack... Sorry, I lack maturity and self control) in whatever way would suit your room decor. I wrapped ribbon around mine and glued the ends down on the back, which gives a nice bit of colour and texture and also coordinates with R's floral mobile and the wall decor.
Drill two starter holes so you don't bugger up all your hard work trying to force bits of metal through the wood, and fix the rack to the wall with screws. This rack is only meant to hold lightweight objects, and weighs almost nothing itself, so don't worry too much about drywall screws and the like.
Yay! I would guess this project cost about three dollars, factoring in all the materials, but if you are like me and have this sort of stuff lying around, it's free! I love it for hanging soakers, but it would be a really cute way of storing hats and coats or dresses or any other adorable baby clothes that need a home and want to be displayed.
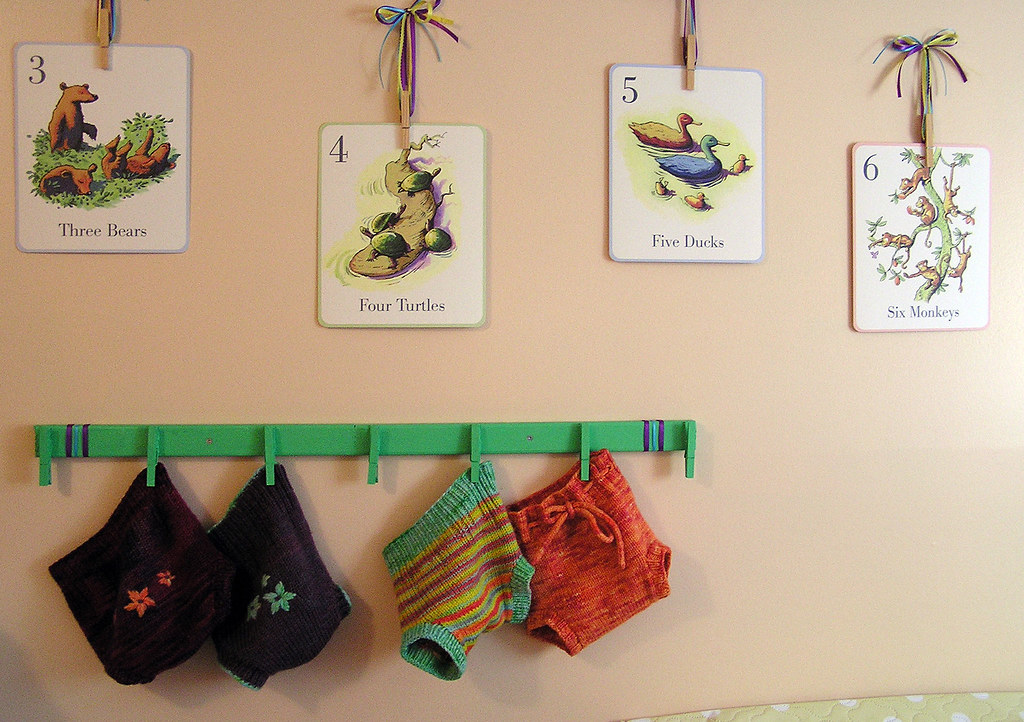
By the way, how much do you love those numbered cards on the wall above the soakers! The illustrations are ridiculously sweet and the cards are sturdy enough that they can be used as a teaching tool when your little one is learning to count!

They are the Animal Counting Cards by eeBoo, an amazing brand of beautiful kids' toys and learning aids. Ours were a gift bought at Sprouts, a lovely boutique in downtown Victoria. I can't afford their stuff, but maybe you can! Their selection of high quality children's items is delightful. I want every single thing they sell.
Nice rack.
ReplyDeleteSeriously though now, what a great idea! Looks awesome.