
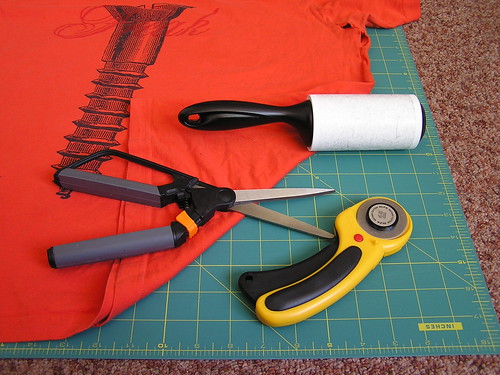
It's great for all sorts of projects, from bags to bathmats and beyond. It's also a fantastic way to recycle the old t-shirts that you and I both know you have stuffed at the back of a closet. You will need fabric scissors and a flat surface on which to work (I use the floor... ps. check out my heinously ugly carpet. It reminds me of ground beef). For faster, smoother cutting use a rotary cutter and a self healing mat. You might also want a lint roller. You will see why later.
Step 1.
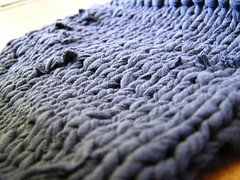
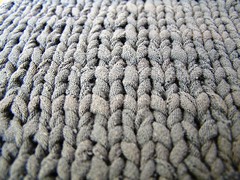
Choose your t-shirt wisely. I am of the opinion that no side seams is darn near a must. A t-shirt with side seams, no matter how you cut it up, will knit or crochet to make a fabric with little bits sticking out of it. Like the pic on the top. A seamless t-shirt will knit up smooth, like the one on the bottom. Seams can also create major weak points in the yarn, which is no fun at all. If you are as anti-seam as I am, look for men's shirts (preferably in really large sizes). They are far less likely to have seams.
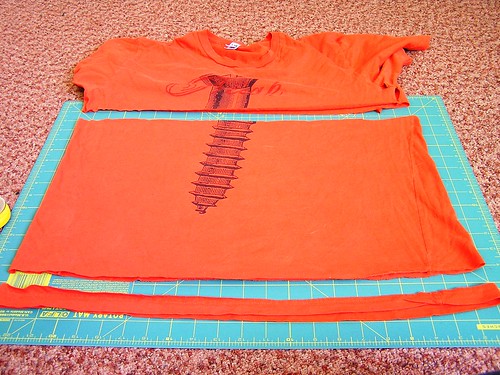
You also need to avoid t's with too much of a design printed on them, as it will likely prevent the yarn from curling nicely. Make sure the fabric is regular t-shirt fabric, which looks like tiny stocking stitch, rather than a micro-rib fabric. Other than the fabric, the orange shirt I will use in this tutorial is all wrong. It has side seams, and a design on the front. But hey, it's what I had on hand.
Step 2.
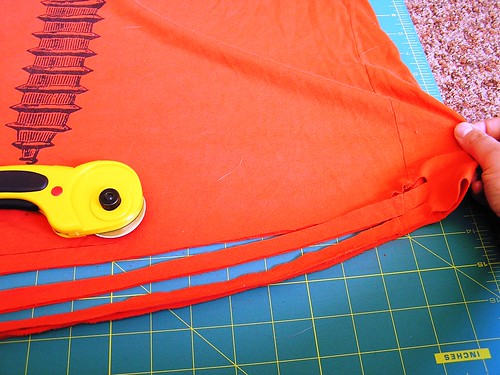
Start by laying the shirt out nice and flat, removing any wrinkles from both the top and bottom layer. Using your rotary cutter or your scissors, cut off the bottom hem and the top, below the armpits. If there are armpit holes, make sure you cut below them. This shirt had major armpit holes. It also essentially said "Screw Freak" on it. I only figured that out a few months ago. Hence the reason why I am chopping it up rather than wearing it.
Step 3.
Cut a strip about 1/2 inch wide, parallel with the bottom of the fabric. Leave about 1 1/2 inches uncut on one side. If you are using a rotary cutter and you aren't used to cutting stretchy fabrics with it, take note. It will create a much better, unbroken cut if you gently tug the fabric AWAY from the cutter (in the direction you are cutting towards). Every time you cut a strip, pull it away from the main body of the fabric a bit, to check for any bits that didn't cut. If you are using scissors (which is just fine, but a bit slower) try to cut a smooth line so there are no little nicks or shaggy bits hanging off.
Step 4.
Keep cutting until the whole shirt is in ribbons, with one edge still intact. Try to keep your cuts relatively parallel, but don't sweat it if they are a bit wiggly. The yarn will still be good, and life goes on. Try not to let the strips get any smaller that 1/4 inch, or there will be a good chance that they break later on. When all the cutting is done I like to hold it up and wave it around and say "Look! A Hula skirt!" My husband can verify this. You can do it at your own discretion.

Step 5.
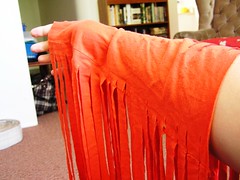
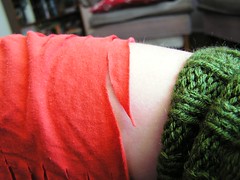
Open up the fabric and drape it over your arm. A sleeve ironing board would also work well, but I bet your arm is easier to find! Begin by cutting a wedge at one end (I start at my... erm... elbow pit. Is there a real name for that?) of the uncut part of the fabric, joining it with the first strip cut on one side. The goal is to make a t-shirt spiral, so you have a continuous loop of yarn. Please, please don't use the rotary cutter for this....Your mother would kill me if she thought I suggested something like that.
Step 6.
Continue cutting the uncut fabric. Always cut from the strip closest to your elbow on one side of the uncut space to the closest strip on the other side. If you goof this up you will sever your continuous strand and end up with a bunch of useless t-shirt rings. Ask me how I know this... Verify that the loop is continuous every few cuts by pushing the cut loops toward your elbow and keeping the rest closer to your hand. If the two sections of hanging loops are connected by a single strand, everything is OK.
Step 7.
Continue Cutting until you run out of strips. Taper the final one off in the same (or rather the opposite, I guess) way as you started cutting way back at the beginning.
Step 8.
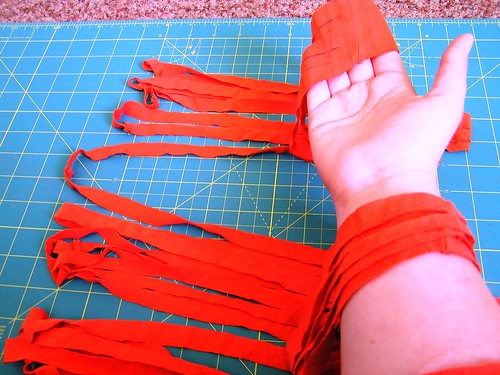
Next we have to stretch the yarn, which turns it from something that looks like ribbon into something that looks like string. Starting at one end, hold the strand gently but firmly in one hand with your thumb on the stocking stitch side of the fabric (originally the outside of the t-shirt). Pull it through your fingers with your other hand, keeping it feeding past your thumb. It may flip over and you will have to readjust it every once in a while. Try to keep it stocking-side-up and feeding under your thumb; it doesn't make a massive difference, but it does help and is worth the very little effort it takes. Stretch it hard enough to curl, but not hard enough to break. You will be able to feel this correct tension easily.
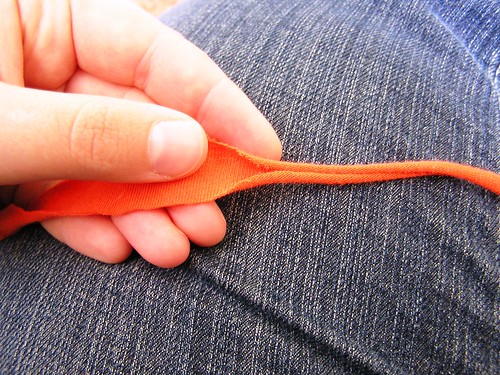
Once you have stretched the entire length of the yarn, do it again! You will want to stretch it several times. I like to do about 4. You don't need to worry about holding it flat with your thumb after the first time. If you did decide to use a shirt with side seams, I do not recommend stretching the seam points. In all likelihood the stitching will undo and you will end up with a bunch of short yarn noodles. You'll be frustrated. Trust me.
Step 9.
Clean up! When you are done you will be COVERED in little bits of t-shirt.
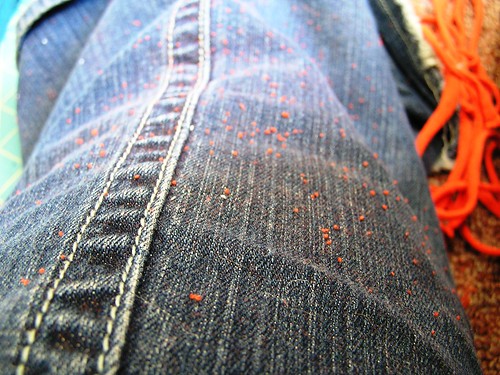
If you didn't have a lint roller at the beginning of all this, you may be regretting it now. Happy cleaning, and happy knitting/crocheting! I would love to see what you make!
No comments:
Post a Comment