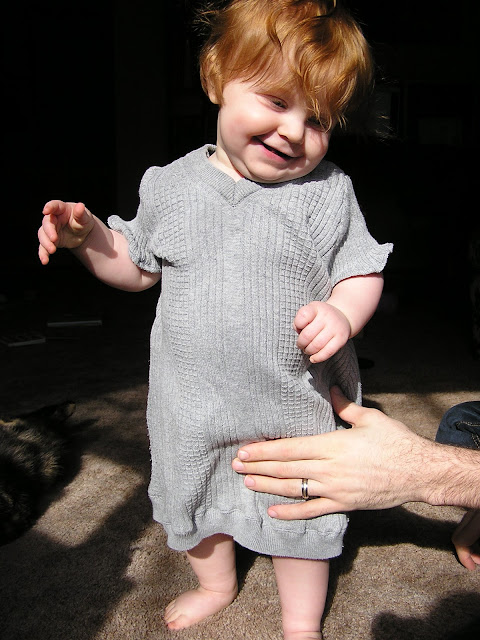
Jake is a sweater vest wearer. This is awesome, because I think he looks super hot in them. However, he's hard on his clothes and they do get in pretty rough shape, pretty quickly. I decided to give one of his vests - 100% cotton with a great big hole in a seam that wasn't worth fixing - a second life as a play dress for Rei, and I thought I'd share my pattern drafting and dress making tutorial. Just so you know, this isn't a recipe for a pretty party dress, it's a comfy, cosy, hard-wearing little number; made for a little girl who is almost as rough on clothes as her daddy is.
Get the how-to after the break!
You'll need: An old sweater vest or v-neck sweater (this one was a size small, and made an 18 month size dress with very little fabric to spare); paper for pattern drafting (I use manila paper but newsprint is awesome too); an existing dress in approximately the correct size; and all the usual sewing stuff.
Start by cutting the bottom ribbing off the sweater, right where it switches from the tight ribbing to the main body of the sweater. Cut the side seams of the sweater vest. If it's a sweater with sleeves, cut those off as well. Set all that aside and get ready to draft a pattern!
Fold your existing dress in half. Be as accurate in your folding as you can.
Line up the fold of the dress with the edge of your pattern drafting paper. Trace the outline of the dress, modifying the neckline to a v-neck shape. Pay particular attention to the Width and angle of the shoulder seam, as well as the where the waist is at both the side and the centre of the dress. Mark where the arm hole starts and ends as well. The length of the dress and the flare of the skirt is up to you - just remember that when you are drafting the bottom of the skirt, the line you draw should meet the edge of your paper at a right angle, and the outside length of the dress must be the same as the inside. To achieve this, measure the length of the dress from the waistline to the hem at the edge of the paper (this is the centre front). Flare out the dress as much as you like (keep in mind that you have only as much fabric as you have width in your sweater) and make the side seam from the waist to hem the same length as the centre front.
Cut out your front pattern piece, label it if you wish (a good idea if you will be keeping your pattern for future use), and then trace it to make your back pattern piece. The back neckline must be modified from the front to match the neckline of the sweater you are working with.
 |
| Note that the only difference between the front and back pieces is the neckline - V shaped in the front, and only slightly curved in the back. |
 |
| Folding over the half sleeve to trace the shape of the entire pattern piece. |
Pattern drafted! Go you!
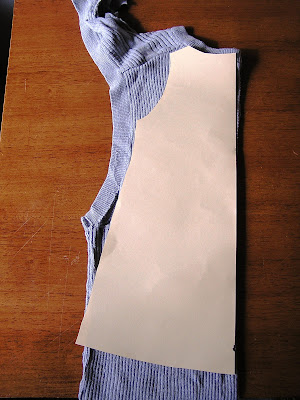
Fold your sweater in half down the centre front as accurately as you can. Line up your front pattern piece with the straight edge along the fold. Line the neckline of the pattern up with the v-neck of the sweater. As you can see in the photo, the neckline of my pattern didn't quite match the sweater. I just kept that in mind when I cut out the back piece, making sure the shoulder seams were approximately the same length on both pieces. Cut out the front, then the back pieces, both on the fold, and keeping the neckline intact. Your sweater will likely try to fray, so handle your pieces as little as possible.
 |
| Front |
 |
| Back |
Cut out your sleeve from the excess fabric at the bottom of the back of the sweater.
A word about seam allowances: If the dress you used to draft your pattern already fits your little one, you'll need to add 1/2 " seam allowance on the side seams, shoulder seams, and armhole seams. Leave an inch on the bottom edge of the sleeve for hemming. Leave 1/2" on the bottom edge if you will be using the bottom of the sweater as trim on the bottom of the dress, or 1" if you'll just hem the dress. The dress I used is way too big yet; I ignored seam allowances so this one would fit, except on the bottom of the sleeve and the bottom of the dress.
Sewing time! Start by sewing the shoulder seams with right sides together, being sure to line up the neck edging so it transfers smoothly over the seam.
 |
| A nice tidy shoulder seam - see how the neck edging lines up in the seam |
Sew in the sleeves, lining up the centre of the sleeve cap with the shoulder seam, and working the ease in the sleeve cap evenly throughout the seam. If you haven't done this before - put the sleeve and body of the dress with right sides together. The curved sleeve cap will be closest to the armhole, and the straight bottom of the sleeve will be pointing towards the neck of the dress. Pin the centre of the cap at the shoulder seam, pin the ends of the seam, and then sew. It should look like the photo below when you turn it right side out.
 |
| After sewing in the sleeves, but before sewing the side seams and sleeve seams. |
Once the sleeves are in, sew up the side seams and sleeve seams with right sides together. Turn the dress right side out. Pin the bottom trim to the bottom of the dress, again, with right sides together. You might need to use the entire ribbed hem of the sweater - I did. In that case, make sure you line up the side seams and distribute the ease evenly. Sew all the way around, starting at a side seam, and if there is excess trim left over, sew an extended side seam and cut off excess trim.
 |
| Pinning on the ribbed hem |
 |
| Edge stitching the bottom hem. My bobbin ran out about a half inch into this seam, and I didn't notice until I'd gone all the way around.... Sigh. |
 | ||||||
| A very happy baby who does not like to stand still for pictures |
 |
| Escape! |
 |
| Squish! |


fabulous job of repurposing !
ReplyDelete